Passo Tre Croci - Sella di Punta Nera (path 215)
Starting point: Passo Tre Croci (1805 m)
Starting point Lat/Lon: 46.5568°N 12.202°E 
Path name: path 215
Time of walking: 4 h 15 min
Difficulty: very difficult marked way
Difficulty of skiing: no data
Altitude difference: 933 m
Altitude difference (by path): 1020 m
Map: Tabacco 03 1:25.000
Access to starting point:
Via the border crossing at Rateče or Predel to Trbiž / Tarvisio and then on the highway in the direction of Vidma / Udine to the Tolmezzo exit. From Tolmezzo we follow the road in the direction of the settlement Ampezzo and the mountain pass Passo della Mauria. The road then descends and brings us to an intersection, where we continue right towards Auronzo. Further on, we follow the signs for the Tre Croci pass.
Path description:
From the Tre Croci pass we head east and walk along the main road for a good 100 metres, then on the right side of the road we will notice signposts directing us towards the Rifugio al Sorapiss hut. The wide macadam path quickly takes us into the forest and then crosses the slopes to the east. The gentle path, from which we occasionally get views of the Cristallo group, leads us past some military structures from the First World War. Later the path narrows and continues mostly through the forest crossing the slopes to the east, while the path rises and falls slightly several times. Further on, the path gradually turns right and takes us to slightly exposed slopes below the peaks Cime di Marcoira and Cime Ciadin del Loudo. The path on this section causes no major difficulties as the traverses are very well secured with a steel cable, and on the ascents steps and a fence assist us. The slope then becomes less steep again and the path, mostly through dwarf pines, takes us to a junction where the path from the Rifugio Tondi hut joins from the right.
At the junction we continue straight ahead and the relatively flat path through larch forest and dwarf pines takes us to a junction just before the hut.
At the junction we can continue left to the hut, which is just a short ascent through dwarf pines, or right to the lake, which is also just a few minutes' walk.
When we reach the lake, the path bypasses the lake on the right side and then turns slightly right, running through a wide valley to the west. On the ascent we have fine views the whole time, especially back to the lake and the sheer northern walls of Punta Sorapiss peak. The path soon begins to ascend more steeply over scree and on the left side we will notice the glacier below Punta Sorapiss summit (Ghiacciaio Occidentale del Sorapis).
Further on the path becomes less steep and then turns slightly left towards the notch Forcella Sora la Cengia del Banco. Before the final ascent to the notch the path takes us to a marked junction.
Left the path leads to the notch and on to the Slataper bivouac, while we head right following the signs for »Sella di Punta Nera«. From the junction the path runs northwest and becomes somewhat more demanding. Here it ascends diagonally below steep walls on the eastern side of Punta Nera peak and occasionally a steel cable and a few pegs assist us. On the ascent considerable caution is needed, especially because of the scree on the path.
Later the path pulls slightly away from the wall to the right and follows a few more ascents aided by a steel cable. In the final section the path then turns left and climbs to the Sella di Punta Nera saddle.
From the saddle we can continue a further good 10 metres right on an unmarked path to the summit, from which there is a very fine view of the surrounding peaks.
On the way: Rifugio Vandelli (1928m), Lago di Sorapiss (1923m)
Pictures:
 1
1 2
2 3
3 4
4 5
5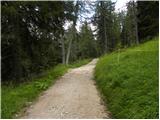 6
6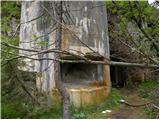 7
7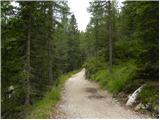 8
8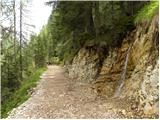 9
9 10
10 11
11 12
12 13
13 14
14 15
15 16
16 17
17 18
18 19
19 20
20 21
21 22
22 23
23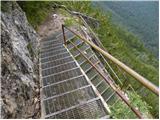 24
24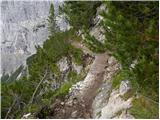 25
25 26
26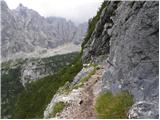 27
27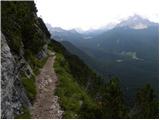 28
28 29
29 30
30 31
31 32
32 33
33 34
34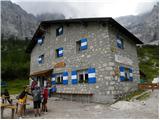 35
35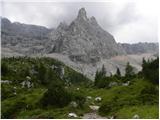 36
36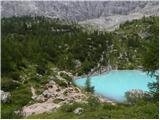 37
37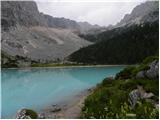 38
38 39
39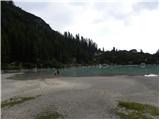 40
40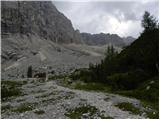 41
41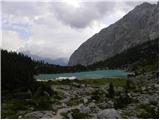 42
42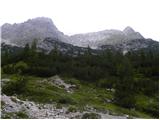 43
43 44
44 45
45 46
46 47
47 48
48 49
49 50
50 51
51 52
52 53
53 54
54 55
55 56
56 57
57 58
58 59
59 60
60 61
61 62
62 63
63 64
64 65
65 66
66 67
67 68
68 69
69 70
70 71
71 72
72 73
73 74
74 75
75 76
76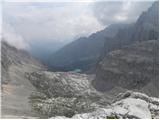 77
77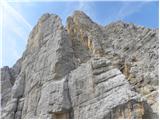 78
78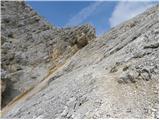 79
79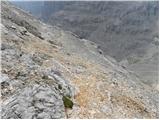 80
80 81
81 82
82 83
83 84
84 85
85 86
86 87
87 88
88 89
89